arduino for beginners – Setting Up – Part 2
This tutorial is about arduino and we going to learn some basics things together. In this Part we going setting up arduino.


Buying an arduino:
Getting an arduino board, we going use Arduino uno.
Getting an arduino board, we going use Arduino uno.
Other Components we need:
-USB Cable.
-Breadboard.
-Flexible Wires.
-Push Button.
-Potentiometers.
-Resistors.
-LEDs.
-RGB LED.
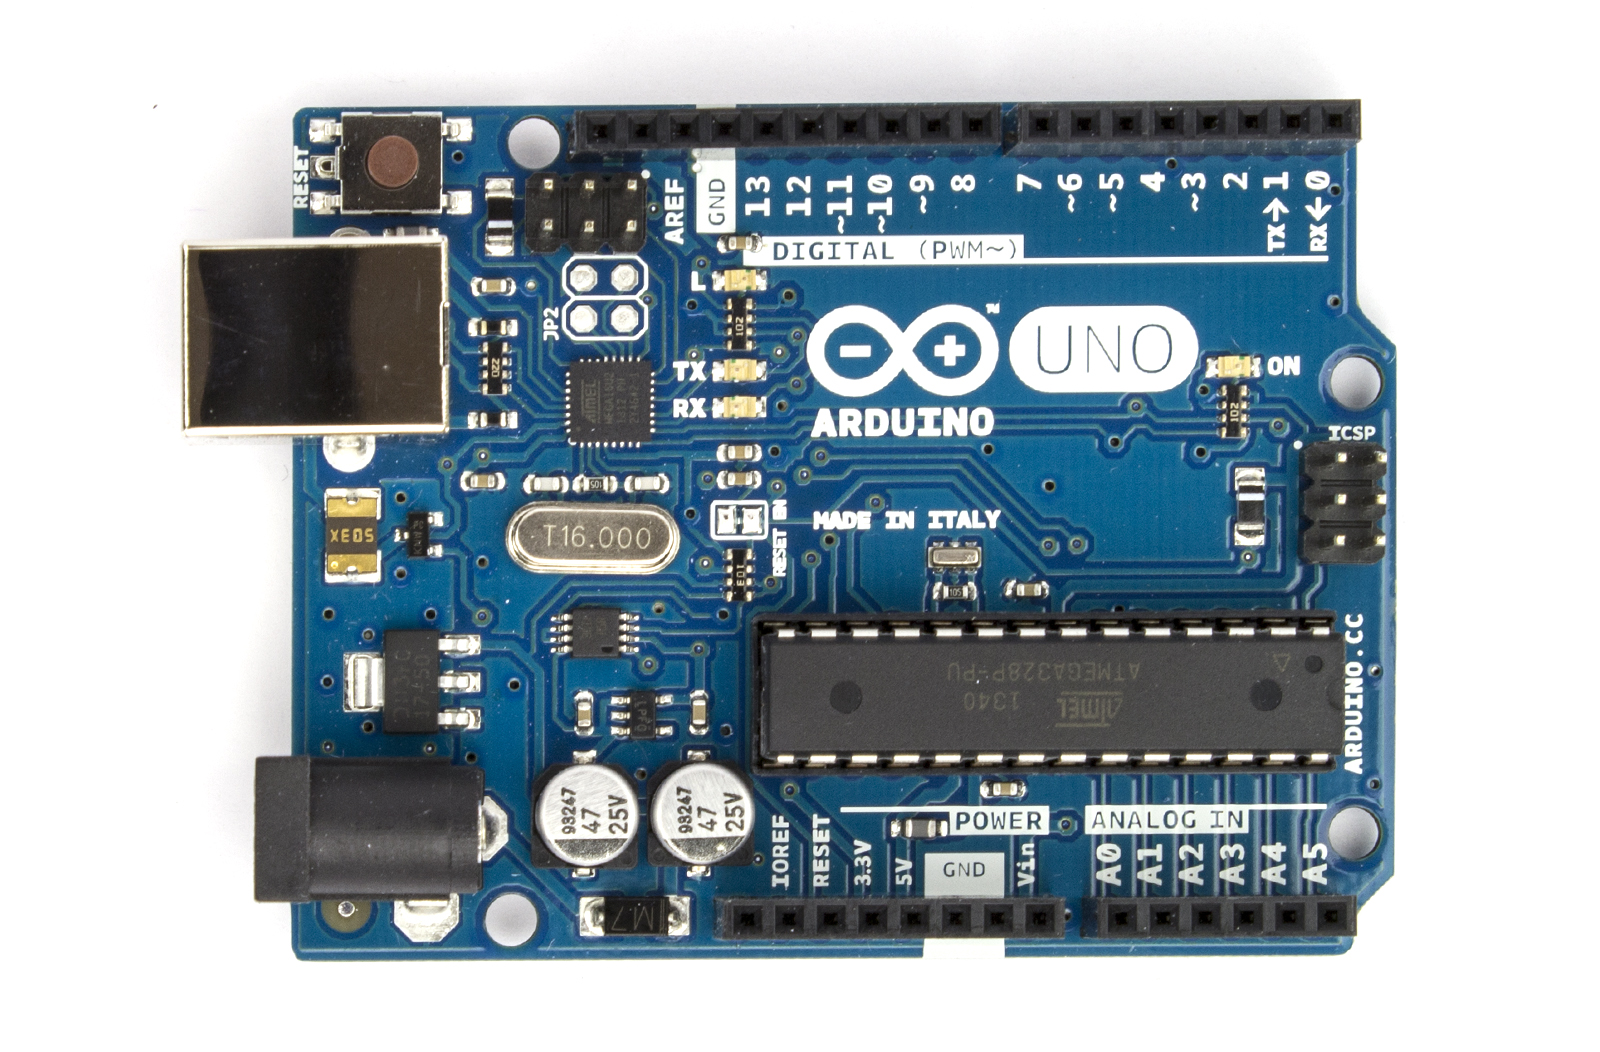
Note : The 6 Digital I/O (Provide PWM output) with the tide ~ symbol next to the number on the board, they allow for Pulse width Modulation (PWM), witch is a technique for controlling power and simulation an analog signal on a digital input pin. One reason to use these pins might be to control brightness LESs.
See The Arduino for Beginners Tutorials
-Breadboard.
-Flexible Wires.
-Push Button.
-Potentiometers.
-Resistors.
-LEDs.
-RGB LED.
The Arduino Board:
| Microcontroller | ATmega328 |
| Operating Voltage | 5V |
| Input Voltage (recommended) | 7-12V |
| Input Voltage (limits) | 6-20V |
| Digital I/O Pins | 14 (of which 6 provide PWM output) |
| Analog Input Pins | 6 |
| DC Current per I/O Pin | 40 mA |
| DC Current for 3.3V Pin | 50 mA |
| Flash Memory | 32 KB (ATmega328) of which 0.5 KB used by bootloader |
| SRAM | 2 KB (ATmega328) |
| EEPROM | 1 KB (ATmega328) |
| Clock Speed | 16 MHz |
| Length | 68.6 mm |
| Width | 53.4 mm |
| Weight | 25 g |
See The Arduino for Beginners Tutorials
Comments
Post a Comment